VLSM Design
When designing a network with VLSM there are some issues to be aware of. For example, if we created the point to point subnet 192.168.1.0/30 we know that this subnet gives us 2 hosts addresses and a range of 4. With that information we know that the first subnet ends at 192.168.1.3 and the next usable subnet begins are 192.168.1.4. What if we needed a subnet with 60 hosts? Well you might think that a /26 mask on the 192.168.1.4 network would work, but actually you can't do that. Take a look at the following image.
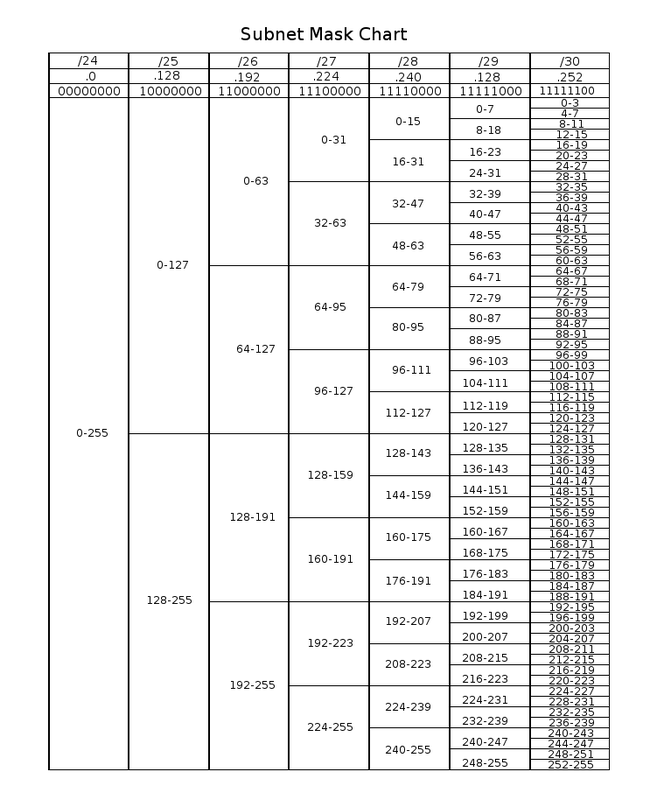
This chart displays every possible subnet in a single octet. If we look at the left most column, it represents a /24 mask which has a range of 256 and is listed as 0-255. The right-most column displays subnets with a /30 mask, each of these subnets has a range of 4 and there are 64 of them.
As you can see each one of the blocks underneath the subnet mask in binary represents a subnet. This chart explains why we cannot create the 192.168.1.4/26 subnet, because the /26 subnets must begin at 0, 64, 128, or 192. Take a look at the chart again -
As you can see each one of the blocks underneath the subnet mask in binary represents a subnet. This chart explains why we cannot create the 192.168.1.4/26 subnet, because the /26 subnets must begin at 0, 64, 128, or 192. Take a look at the chart again -
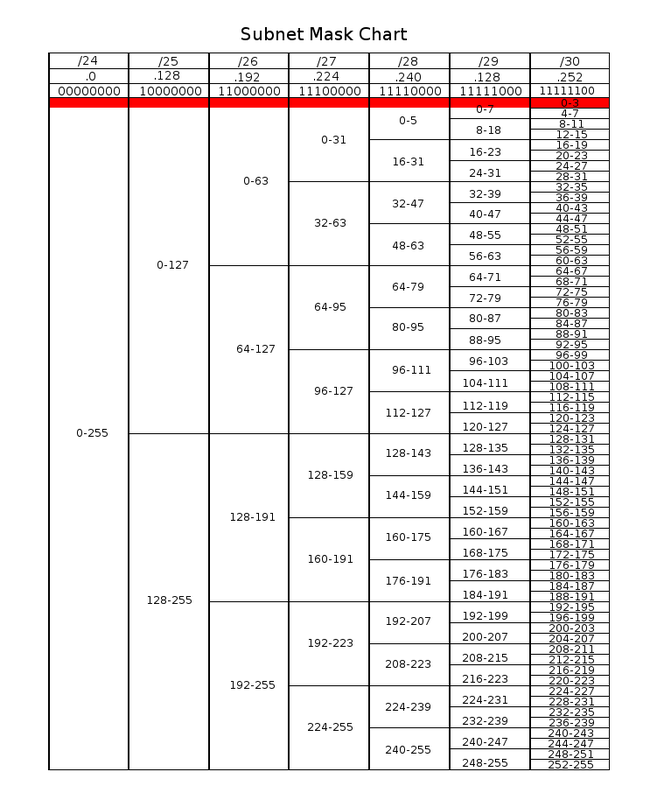
We see that the 192.168.1.0/30 subnet means we cannot use any of the subnets that the red touches because we have used up address space that is required for the other subnets to be created.
Let's mark the VLSM network we just created onto the subnetting chart and see what we get.
Let's mark the VLSM network we just created onto the subnetting chart and see what we get.
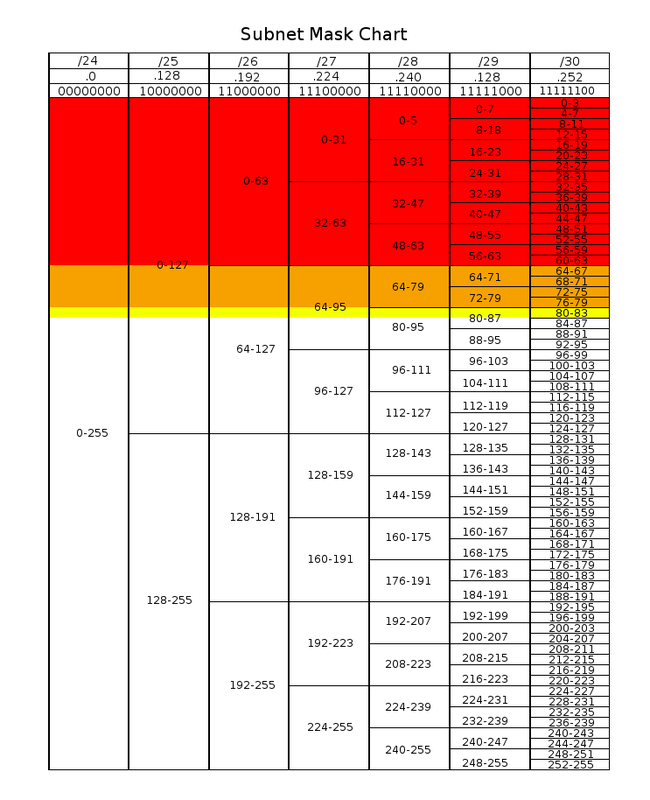
Our first subnet, 192.168.1.0/26, is labeled in red. The second subnet, 192.168.1.64/28, is labelled in orange. The last subnet is the point to point subnet, 192.168.1.80/30 and is labelled in yellow. Using this chart we can easily tell which subnets are no longer usable in the network, for instance we could not create the first /25 subnet because we've used the address space. When designing a VLSM network it is the best idea to create your largest subnets first and work down to the smallest as to avoid wasting address space. If we were to have created our subnets starting with the smallest then our subnetting chart would look like this -
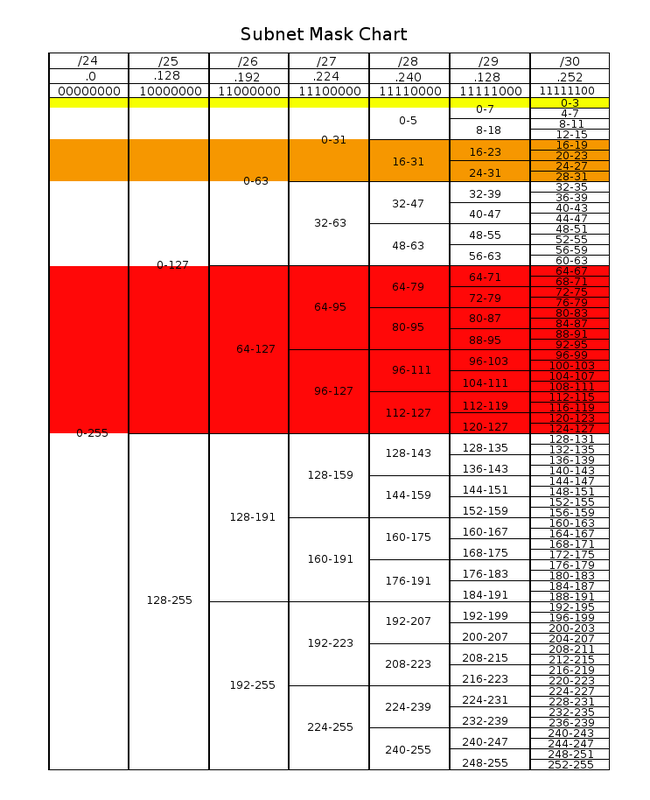
As you can tell this is much less organized and can be a waste of address space. If you create your subnets starting with the largest and working towards the smallest you won't have any of these problems and all the subnets will line up.